Raising Marigolds

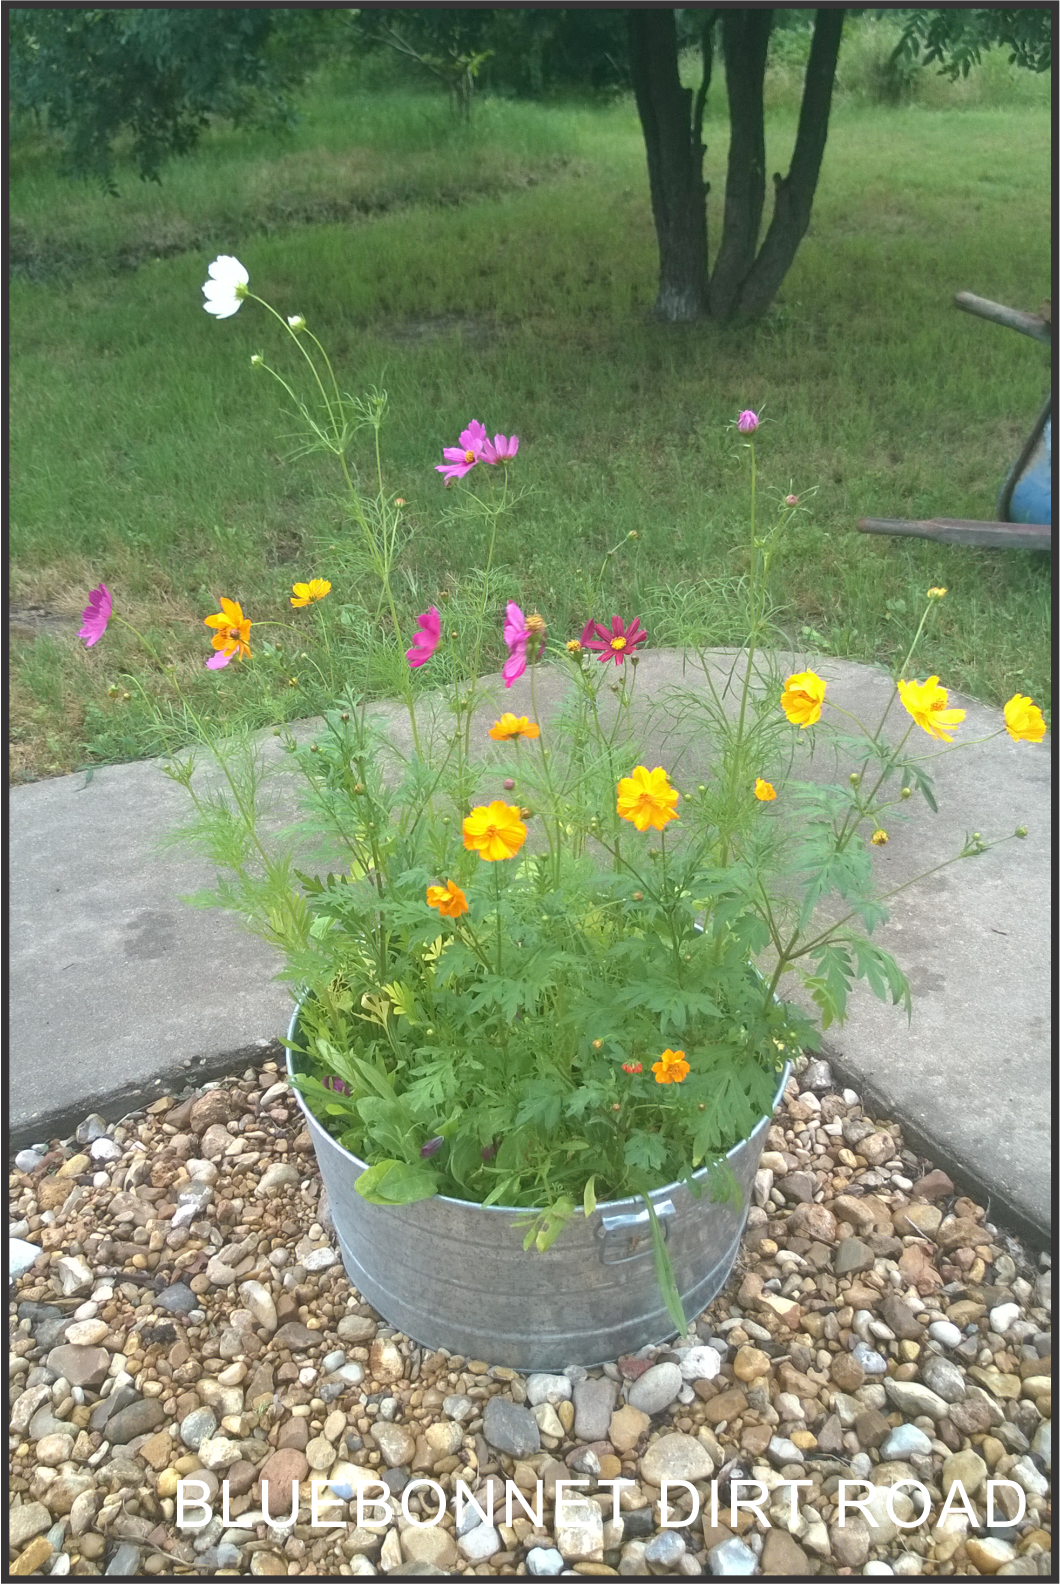
I’ve tried a few times to grow flowering plants with no success. In the past I’ve always purchased the potted flowers that already have bloomed and as soon as I get them home and planted, the flowers disappear and the plant stops growing. I know with more research and time and effort I could probably figure something out, but I am not that patient and don’t have extra time for that.

So this year I decided to start from seed and see how that went. Well, so far it’s been a success. Along with my wildflower pots, I planted one pot with just marigold seeds and they are doing very well!

1

Besides planting them in the pot and making sure they are thoroughly watered, I don’t do anything else.

2One thing that I feel has made a huge difference is that I water them with rain water. A few years back our water company had a deal on rain barrels so Hollywood invested in four of them, placing one at each corner of our house. These things always stay full, especially with all of the rain we’ve been getting lately.

If I manage to keep these alive, I’ll definitely plant more pots next spring!

Accidentally in the Way on Purpose

Blue is a large dog and the perfect height for me to scratch and pet him. All I have to do is drop my arm and he’s there, ready to be scratched. With the girls getting a bit older, there is more time for me to devote to scratching time and he’s taking full advantage.

One of these days I’m gonna fall and break my neck with all the criss-crossing he does in front of me. Oh well, he’s a cutey so I don’t mind. The scratching that is…not the potential neck breaking part.

Here he is making his move…

1

cutting me off…

2

and then going in for the scratch. Haha…dogs are funny.

3

Shaving Cream Mess

I really wish I was the kind of momma that really enjoyed making messes with her children. I browse around the interwebs looking for all sorts of fun at home activities for the girls and I always cringe when I see the homemade goop and silly putty.  The kids look like they are having a blast, but I am always thinking…how much of a mess is this gonna make and do I really want to clean it up afterwards.

Well, I went out on a limb and decided to have a little bit of shaving cream fun! This was not our first time breaking it out. Little Miss and I dabbled in it when she was about two, but she didn’t make too much of a mess and she’s kinda like me (in more ways than one), after about 10 minutes, she was done and wanted to wash her hands. I was relieved.

Curly Q, on the other hand, loves to make messes and tear things apart.  It’s how she learns and I want to make sure she channels that into something besides my house plants.  So I figured, why not give it another shot?

I started filling up their tubs with shaving cream, but of course Curly Q wanted to do it herself. I was happy to oblige.

1

That didn’t last long though. It was too hard for her to push the button to get it out.  I then let them squirt a couple of drops of food coloring to help peek their interest.  Yeah….not going to do that again.  The food coloring stained their hands and my pavement.  I didn’t really think that through very well.  It eventually washed away with the rain, but it still bothered me.

2

Then I let them have at it! They stuck their feetsies in it.

3

We ruined a couple of paint brushes. (They were old anyway)

4

We even hid some left over Easter eggs in there as well!

5

Overall it was OK.  I didn’t too much care for the smell and after some time it did get pretty slippery with their bare feet.  After Curly Q slipped once I was done.  They got about 20 good minutes out of it.  Curly Q had a blast of course.  Check out her marching skills!

6I had to make her a skirt…we’re not always big on pants out here. 🙂

Poor Pear Tree

We planted a pear tree two years ago hoping that one day we’d get some pears. Well after Grasshoppergate of 2014, we thought we’d lost her. Honestly, we have no idea how to take care of a pear tree besides water it and give it some new mulch in the spring.. We did learn, however, that grasshoppers love pear tree leaves.

This year we are looking into some preventative measures to make sure our poor pear tree is not bald by the end of the summer. She barely had any leaves on her by July of last year.

But, there’s good news! She did make a full recovery this year and looks pretty healthy!

1

She even has little bitty pears! At least I think that’s what those little knots are.

2

Our options so far are to cover it with netting, place bird feeders, bird baths or bird houses nearby, spray it with a natural grasshopper terminator, or just keep plucking the grasshoppers off.

I’m in favor of terminating. Or maybe we should just get some chickens. They get an all you can eat buffet of grasshoppers while we get pears and some REAL free range eggs! It’s a win win-win situation!

Preparing and Planting Our Raised Beds

After our excavation, and a couple-a-days of rain, we thought it was time to head on over to the home improvement store and pick up a few bags of garden soil and compost manure.

We started by loosening up the first layer of dirt we added a couple of days before because it had been compacted and hardened by the rain. On top of that we (by we I mean Hollywood) layered a few bags of garden soil and smoothed it out.

1

Then we layered down a few bags of compost manure.

2

With the help of Little Miss and Curly Q, we smoothed that out as well. I let them help for a little bit, but the thought of them flipping around that manure made my nerves bad. All I could see was them getting that on their hands and then putting those hands in their mouths.

3

The smell of the manure reminded me of my childhood. It was me and my siblings responsibility to go around and pick up dried cow patties for the garden; bare handed. For those of you who are not familiar with the term “cow patties”, those are dried cow droppings. Gross, I know, but were young we didn’t know any better.

We then took some time to flip the soil and made sure all of the layers were nice and mixed into one cohesive produce bearing unit. Here’s what the finished bed looks like! Ooooh pretty!

5

We watered it down, positioned our two watermelon plants and two cucumber plants, and tucked them right in!

4

It’s been a couple of days and the plants are still looking good. The cucumbers have actually started sprouting a new set of leaves!

Hoping to get some decent watermelon this year. Our watermelons last year did not turn out so well.

Excavation

Our previous garden we had was just too big for us.  Plus, it was in a bad spot where it good too much “full sun” and critters of all sorts were having a field day of it at night. We’d wake up to see that something had taken little nibbles out of our watermelon.

Either way, this year we decided to do a raised bed in a different location where it would get a bit of shade during the day and Blue could keep a better eye on it during the night.

Who knew that filling up a raised bed would be so expensive if you filled it all with the garden soil you can buy at the store. Well, that wasn’t an option for us so we grabbed our shovels and dug up some soil from the site of our previous garden.  And of course Little Miss and Curly Q were glad to help!

2

Curly Q helped Hollywood with filling the raised bed…

5

while Little Miss collected grubs and other critters. There’s a few millipedes in there somewhere. Doesn’t it just make your skin crawl?

3

While Hollywood did most of the manual labor (I supervised of course).  He did let me push the wheelbarrow once. The smile was to cover up the pain I was feeling in my legs.  It really was heavy.

4

And once we got all of the dirt we needed. Little Miss was so proud she wanted me to take a picture of her posing with it. She really was posing. There was no movement from her. She just sat there very still and pretended to dig.  She’s funny.

1Our next step is the compost, but that’s a whole other story.